
Some time ago I ordered a (tr)uSDX kit and assembled it according to the video instructions by Manuel (DL2MAN). The assembly itself went quite smooth. However, the tuning took some time and although there were no real surprises, some information for success was hidden in the depth of the discussion groups. So I thought summarizing them here might be helpful.
Tuning the Filters
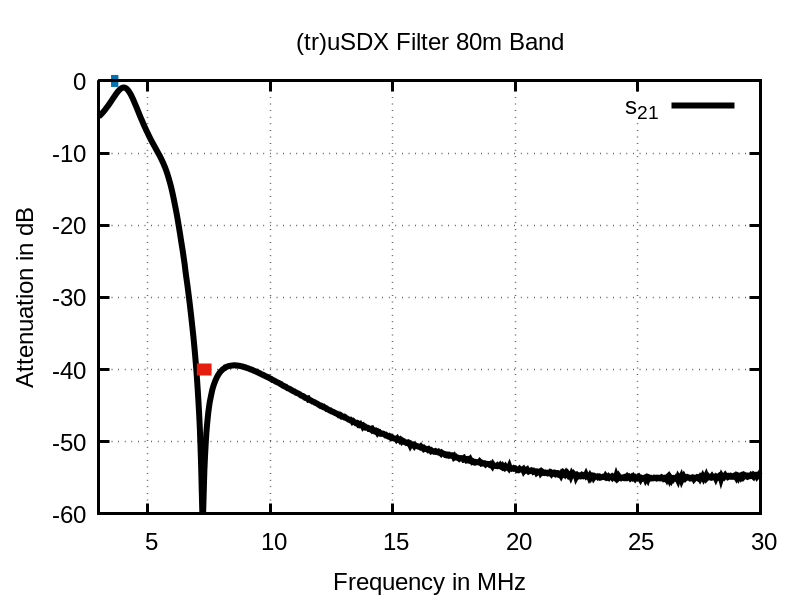
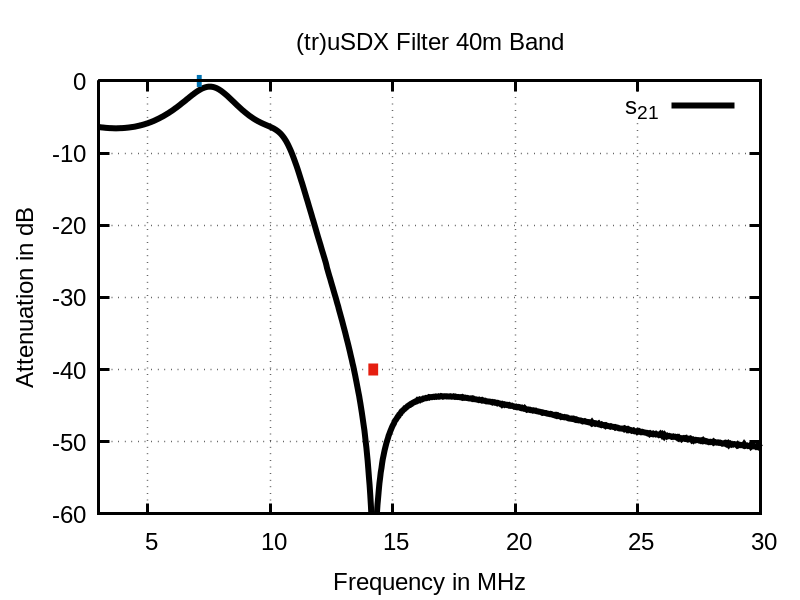
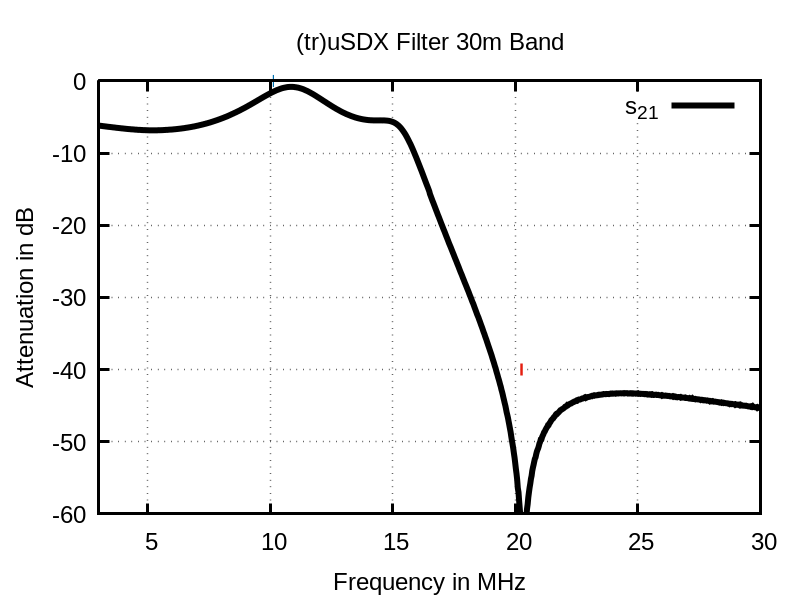
Tuning the filters is already explained quite well in the video tutorial. For reference, here are the actual filter curves I achieved after tuning. I indicated the passband with a wide blue line at 0dB and the first harmonic with a wide red line at -40dB.

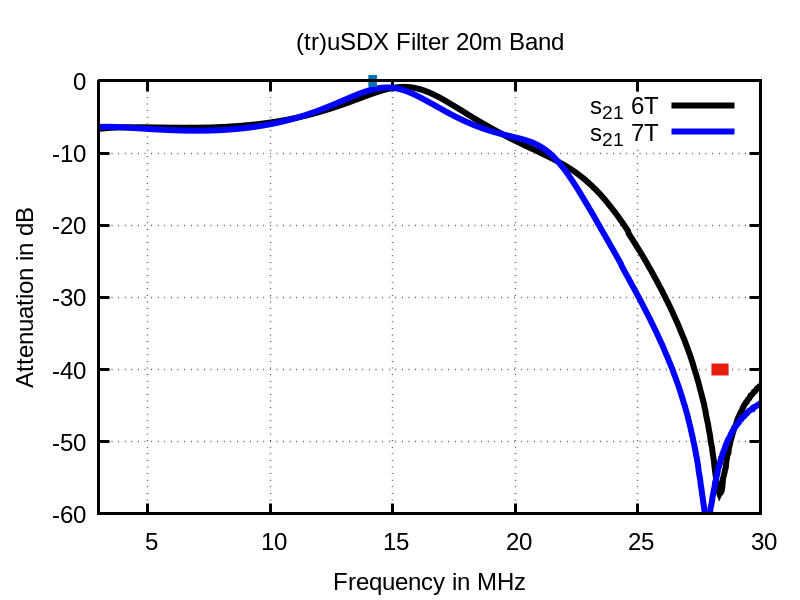
For 20m, I was not able to put the notch high enough in frequency to reach the desired stop band with the number of turns given in the instructions, so I removed one turn. After that I had to struggle to move the notch down in frequency to fit the stop band. In the end I succeeded but as one can see from the graph, I could have left the coil as it was because the additional suppression is marginal.
Tuning Rshunt
After tuning the filters, I wanted to tune the efficiency of the amplifier but could not reach more than about 68%. After some digging through the forum, I found the solution in the quite low Rshunt value setting in my firmware. It was set to 17, where a setting of 19 is more reasonable for my setup. After that, I was able to tune the efficiency in the desired region above 75%.
The procedure to determine the correct value for Rshunt is quite straight forward:
- Measure the receive power consumption PRx of your (tr)uSDX. I reduced the output volume to the point where the current did not decrease any more for lower volumes.
- Measure the transmit power consumption PTX and the RF output power PRF.
- Compute the efficiency by eff = PRF/(PTX-PRX).
- Tune Rshunt to match the computed efficiencies over the different bands to the displayed values.
I took measurements over all bands and was able to match the measured and the displayed efficiency quite well but not perfectly which cannot be expected from the small device.
Tuning the Efficiency
After setting the correct Rshunt value, tuning the efficiency for the lower bandy went as described in the video tutorial. For the 20m band however, the output power was quite low and the efficiency also not very good. So I removed one turn from the coil and was also able to achieve about 4.5 to 5W of RF output power at a decent efficiency.
Using it with WSJT-X on a Raspberry Pi
In order to successfully use CAT control on Linux, you have to execute the following command to successfully access the interface:
stty -F /dev/ttyUSB0 raw -echo -echoe -echoctl -hupcl -echoke 38400The command has to be executed before accessing the interface but it worked as well while WSJT-X was already running. Before the command, the CAT control failed, after the command, everything worked as expected.
Summary
Thanks to DL2MAN and PE1NNZ for this great device!
Important Links
The original posts from the forum, where I found the information given above:
- How to tune R Shunt: https://forum.dl2man.de/viewtopic.php?t=550
- Set-up for digital modes: https://www.youtube.com/watch?v=W5M2C7rW0b0
- Using the CAT interface under LINUX: https://forum.dl2man.de/viewtopic.php?p=4108#p4108